How to Make Raw Milk Yogurt using an Instant Pot
Our family loves homemade raw milk yogurt. I make a new batch weekly. Here’s my favourite method using an Instant Pot. Give it a try!

What is yogurt?
Yogurt is a cultured dairy product. It is made by adding live bacteria to milk and warming it to allow the bacteria to culture the milk. These friendly probiotic bacteria have health benefits and help with digestion. Yogurt is an excellent source of protein and a fat called conjugated linoleic acid (CLA).
How to skim the raw milk
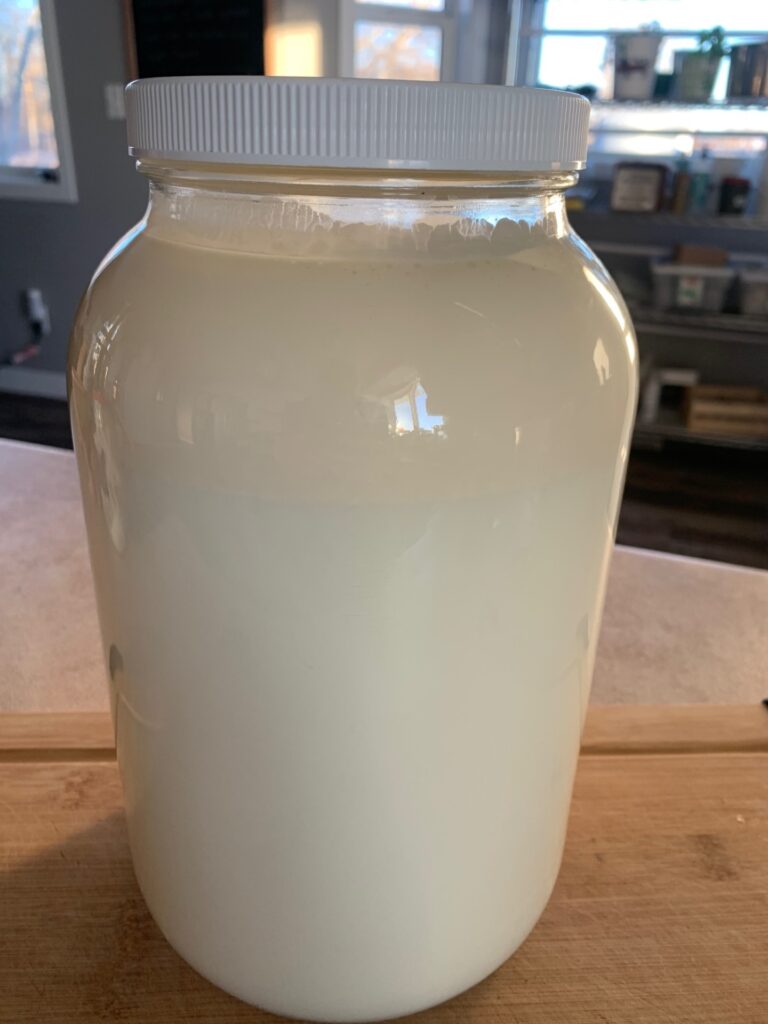
I store my raw milk in 4 litre glass jars and after 24 hours of refrigeration, the cream rises to the top. You can see the cream line in the photo above. I make our yogurt with partially skimmed raw milk. Therefore, I skim off about 1 cup (250 ml) of the cream. I pour it into a clean jar using a ladle. I use the cream for coffee, ice cream, or butter. See my easy butter recipe here.
I put the lid back on the 4 litre jar and shake the milk to distribute the cream back into the milk. Now I have partially skimmed milk to use for my yogurt. If you prefer full fat yogurt, shake the whole jar and use the full fat milk.
Cow’s milk contains as many as 400 different types of fatty acids. These fatty acids are made in the cow’s rumen and come from the cow’s feed and the microbial activity during digestion. This miracle makes milk fat the most complex of all naturally occurring fats.
Keto tip: if you are following a keto diet, you’ll want to use full fat milk.
Why I use an Instant Pot?
The culturing of the milk uses a thermophilic (thermo means heat) culture which requires a warm environment at a consistent temperature of around 110F for about 8-12 hours. There are several ways to achieve this. Some folks use a yogurt maker, but I find these make too small of a batch for our family. Some folks use a crock pot, a dehydrator, or an oven with the pilot light on. And Kate from Venison for Dinner uses a cooler filled with warm water!
For me, the Instant Pot is the easiest way. I can make everything in one pot (making clean up easy) and I can set it and forget it. Not every Instant Pot has a yogurt setting, so if you’re purchasing one, do make sure to select one with a yogurt setting.
Is raw milk safe?
Yes and no. Handling raw milk requires requires consistent best practices that focus on cleanliness and temperature. It starts with milking. It is essential to be fastidious about cleaning your cow’s udder and teats, and using clean milking equipment. If cleanliness best practices are not used, contamination can happen. Especially because cows do poop and pee, sometimes even when milking. And they have hair. That falls out. Into the milk.
We use a portable milk machine to help prevent contamination. Conversely, homesteaders who choose to hand milk often use a small bucket to catch the milk so that if anything falls in the bucket they have less to dump out. With our machine, we have to ensure that the can, the claw, and the hoses are clean at all times. Super clean. Super, super clean.
I bring the warm milk into the house and, as quickly as possible, I filter and pour it into clean jars and I get those jars into the fridge as fast as possible. The goal is to get the get the milk down to 3 degrees Celsius, within one hour.
Keeping things clean for your own family milk cow is doable. This is an excellent video from Venison for Dinner about how to clean and milk your cow.
Raw milk is live milk
Raw milk is a live food that has naturally occurring, beneficial bacteria which has been proven to help promote gut health. When raw milk is left out at room temperature, the good bacteria (mainly lactic acid bacteria), will begin to spontaneously ferment the milk. Depending on the temperature of the room, the milk will turn into a mesophilic culture called clabber within 12-72 hours.
Sadly, these naturally occurring friendly bacteria compete with the thermophilic culture needed to make yogurt and your end product will not taste like yogurt. We love drinking our raw milk from our family milk cow. However, to get the consistent texture and flavour of yogurt, we have to pasteurize the milk first.
Although pasteurization strips raw milk from its naturally occurring vitamins and enzymes, we believe the nutritional benefits of the probiotics in yogurt make it worth the process. Below, I am going to teach you how to pasteurize your raw milk at the lowest temperature.
Where to buy raw milk
In some states, it is illegal to sell raw milk. In others, consumers are able to purchase Raw Milk. Where I live, in Canada, the only way to have raw milk is to own your own family milk cow.
Where to Source your Thermophilic Culture
The first time you make yogurt, you need to source a thermophilic culture (starter). You can buy dehydrated cultures and health food stores, however I find these terribly expensive. I prefer to go to the grocery store and buy a container of plain yogurt with no sugar or flavoring. Read the ingredients and ensure it says “live or active cultures”.
After your first batch of homemade yogurt, you will save 1 cup of the yogurt to be your starter for the next batch. After a few months, you may notice your yogurt starts to have a fizzy texture. When this happens to me, I go back to the grocery store and start again with store-bought plain yogurt.

Equipment Needed
- Instant Pot (with the yogurt setting)
- Measuring cup
- Whisk
- Thermometer
Ingredients
- 7 cups raw milk (whole, partially skimmed, or skimmed–your choice)
- 1 cup of yogurt starter (first time, use store-bought plain yogurt)
Instructions
Pour 7 cups of raw milk into the stainless steel insert in the Instant Pot. Press the crock pot setting and set the timer for 30 minutes. Do not put the lid on.

After the Instant Pot beeps, check the temperature of the milk. It should be around 71C (161 F). Congratulations, you’ve just pasteurized your milk!

Next, you need to let the milk cool down to around 43 C (110 F) before adding the yogurt starter. If you add it while the milk is too hot, it will kill your starter bacteria. You can set the Instant Pot insert into a sink of cold water to cool. However, I usually just leave the insert on the stove for a few hours to cool. (In the picture below, you’ll see some yellow chunks floating. That’s the cream.)

Once the milk has cooled to at least 43 C (110 F), whisk in the 1 cup of yogurt starter culture. If you forgot about the milk and it cooled to room temperature, that’s ok. You don’t have to heat it up. Just add your starter.
Next, put the stainless steel insert back into the Instant Pot and click the yogurt button which will automatically set for 8 hours. Put the lid on, seal the vent at the top, and forget about it!
I usually pasteurize my milk in the morning, let the milk cool during the day, and then set it to culture overnight. When I wake up, the yogurt is ready to eat!

After 8 hours, the Instant Pot will beep and your yogurt is ready to eat. Congrats!

Remove 1 cup of the new yogurt and put it in a glass jar in the fridge. Put the date on it. This is your starter culture for the next batch. I try to make a new batch every week for the best flavour and consistency.
Spoon the rest of the yogurt in a large glass jar for the family to eat throughout the week. While it may seem thinner and more runny than store bought yogurt, that is because commercial yogurts can contain thickeners.
Our family prefers a thicker, prefers Greek-style yogurt. So, I set a strainer over a bowl and pour the fresh yogurt in there. This strains out some of the whey and results in a thicker yogurt. You can let it strain as long as you like.

Uses for the whey
If you strained the yogurt to make Greek-style (thicker) yogurt, you will be left with some whey in your bowl. This can be stored in the fridge for up to one week and can be used for drinking in smoothies or baking. It is most popular in buttermilk, pancakes, muffins, and bread. As well, you can serve it to your animals or chickens or pour it on your compost.
Ways to Enjoy Homemade Yogurt
- Eat with fresh fruit for a nutritious snack or dessert
- Eat as a topping for homemade granola
- Use as a sour cream substitute
I make these Yogurt Parfaits by putting some raw or frozen fruit on the bottom of a half pint jar, adding a 1/2 teaspoon of honey, and topping with homemade yogurt. I put lids on them, pop them in the fridge, and they are ready for a grab and go lunch snack.

Homemade Yogurt from Raw Milk using an Instant Pot

Ingredients
- 7 cups raw milk (whole, partially skimmed, or skimmed–your choice)
- 1 cup of yogurt starter (first time, use store-bought plain yogurt)
Instructions
- Pour 7 cups of raw milk into the stainless steel insert in the Instant
Pot. Press the crock pot setting and set the timer for 30 minutes. Do
not put the lid on. - After the Instant Pot beeps, check the temperature of the milk. It
should be around 71C (161 F). Congratulations, you’ve just pasteurized
your milk! - Next, you need to let the milk cool down to around 43 C (110 F) before
adding the yogurt starter. If you add it while the milk is too hot, it
will kill your starter bacteria. You can set the Instant Pot insert
into a sink of cold water to cool. However, I usually just leave the
insert on the stove for a few hours to cool. - Once the milk has cooled to at least 43 C (110 F), whisk in the 1 cup
of yogurt starter culture. If you forgot about the milk and it cooled
to room temperature, that’s ok. You don’t have to heat it up. Just add
your starter. - Next, put the stainless steel insert back into the Instant Pot and
click the yogurt button which will automatically set for 8 hours. Put
the lid on, seal the vent at the top, and forget about it! - I usually pasteurize my milk in the morning, let the milk cool during
the day, and then set it to culture overnight. When I wake up, the
yogurt is ready to eat! - After 8 hours, the Instant Pot will beep and your yogurt is ready to eat. Congrats!
- Remove 1 cup of the new yogurt and put it in a glass jar in the
fridge. Put the date on it. This is your starter culture for the next
batch. I try to make a new batch every week for the best flavour and
consistency. - Spoon the rest of the yogurt in a large glass jar for the family to
eat throughout the week. While it may seem thinner and more runny than
store bought yogurt, that is because commercial yogurts can contain
thickeners. - Our family prefers a thicker, prefers Greek-style yogurt. So, I set a strainer over a bowl and pour the fresh yogurt in there. This strains out some of the whey and results in a thicker yogurt. You can let it strain as long as you like.
If you make this recipe, please give us a star rating and comment below. We would love to see a picture of your homemade yogurt on Instagram @grothhaushomesteading